Thursday 28 April 2011

LOW ANGLE | EN WAN TASK :)


Tugasan ni diberi nama Low Angle, tugasan ini adalah salah satu daripada 5 tugasan yang telah diberikan oleh en wan. Alhamdulillah gmbar saya telah diprocedd oleh en wan, saya menggunakan satu speedlite dan mggunakan direct flash, mmdangkan sy tidak mmpunyai trigger.  Alhamdulillah saya telah mdpt shoot yang tbaik pada hari saya mjalankan photoshoot ini.

MENS WEAR IN RAIN | EN WAN TASK


Alhamdullilah , saya sgt bpuas hati dengan photoshoot ni. trima kasih pada model sy yang bgtu dedikasi mmberikan krjasama.Saya juga menggunakan model yang sama kerana beliau begitu serasi bersama saya serta pandai mmberikan pose yang mnarik

OI OI ! SKIN HEAD PHOTOSHOOT


A little bit about skinhead: A skinhead is a member of a subculture that originated among working class youths in the United Kingdom in the 1960s, and then spread to other parts of the world. Named for their close-cropped or shaven heads, the first skinheads were greatly influenced by West Indian (specifically Jamaican) rude boys and British mods, in terms of fashion, music and lifestyle.Originally, the skinhead subculture was primarily based on those elements, not politics or race. Since then, however, attitudes toward race and politics have become factors by which some skinheads align themselves. The political spectrum within the skinhead scene ranges from the far right to the far left, although many skinheads are apoliticalFashion-wise, skinheads range from a clean-cut 1960s mod-influenced style to less-strict punk- and hardcore-influenced styles

Wednesday 20 April 2011

ANNA MARRIYA BIRTHDAY


Anna Marriya birthday:) alhamdullilah sy dikurniakan matahari yg sgt cntik pada hari itu. Anna sudah brusia satu tahun.

Tuesday 19 April 2011

MENS WEAR


ok ni gambar untuk kelas En Wan:)

BLUR MOOD

i have no idea! lol* ok akan datang ni akan ada isi2 yang lebih padat ye anak-anak ye:DD

Food Photography – An Introduction

Food

1. Lighting

Treat the food you’re photographing as you would any other still life subject and ensure that it is well lit. Many of the poor examples of food photography that I’ve come across in the research for this article could have been drastically improved with adequate lighting. One of the best places to photograph food is by a window where there is plenty of natural light – perhaps supported with flash bounced off a ceiling or wall to give more balanced lighting that cuts out the shadows. This daylight helps to keep the food looking much more natural.


2. Props

Pay attention not only to the arrangement of the food itself but to the context that you put it in including the plate or bowl and any table settings around it. Don’t clutter the photo with a full table setting but consider one or two extra elements such as a glass, fork, flower or napkin. These elements can often be placed in secondary positions in the foreground or background of your shot.

Photography-Food


3. Be Quick

Food doesn’t keep it’s appetizing looks for long so as a photographer you’ll need to be well prepared and able to shoot quickly after it’s been cooked before it melts, collapses, wilts and/or changes color. This means being prepared and knowing what you want to achieve before the food arrives. One strategy that some use is to have the shot completely set up with props before the food is ready and then to substitute a stand-in plate to get your exposure right. Then when the food is ready you just switch the stand-in plate with the real thing and you’re ready to start shooting.


4. Style it

The way food is set out on the plate is as important as the way you photograph it. Pay attention to the balance of food in a shot (color, shapes etc) and leave a way into the shot (using leading lines and the rule of thirds to help guide your viewer’s eye into the dish). One of the best ways to learn is to get some cook books to see how the pros do it.

5. Enhance it

One tip that a photographer gave me last week when I said I was writing this was to have some vegetable oil on hand and to brush it over food to make it glisten in your shots.


Food-Photo

6. Get Down Low

A mistake that many beginner food photographers make is taking shots that look down on a plate from directly above. While this can work in some circumstances – in most cases you’ll get a more better shot by shooting from down close to plate level (or slightly above it).


7. Macro

Really focusing in upon just one part of the dish can be an effective way of highlighting the different elements of it.


8. Steam

Having steam rising off your food can give it a ‘just cooked’ feel which some food photographers like. Of course this can be difficult to achieve naturally. I spoke with one food stylist a few years back who told me that they added steam with a number of artificial strategies including microwaving water soaked cotton balls and placing them behind food. This is probably a little advance for most of us – however it was an interesting trick so I thought I’d include it.


Read more: http://www.digital-photography-school.com/food-photography-an-introduction#ixzz1Jz0R5lzW


Saturday 16 April 2011

Photographing people


Pictures of the people we love make us smile. Be ready with your camera and you'll be rewarded with memories that rekindle emotions for years to come.


Have fun!
Don't work too hard to position your subject. The goal is for him or her to relax and fall into a natural pose. Try shooting in your subject's favorite place, or at least a comfortable place. Meaningful props, like a trophy, a musical instrument, or even a fish, can add interest.


Get close
Fill the camera's viewfinder or LCD display with your subject to create pictures with greater impact. Step in close or use your camera's zoom to emphasize what is important and exclude the rest. Check the manual for your camera's closest focusing distance


Take candid pictures 
Ignore the impulse to force your subjects to always pose staring at the camera. Variety is important. Take candid pictures to show them working, playing, leaning against a banister chatting, or relaxing


Use natural light
You may be surprised to learn that cloudy, overcast days provide the best lighting for pictures of people. Bright sun makes people squint, and it throws harsh shadows on their faces. On overcast days, the soft light flatters faces. Indoors, try turning off the flash and use the light coming in from a window to give your subject a soft, almost glowing appearance


Avoid harsh shadows
Avoid harsh facial shadows by using the soft lighting of a cloudy day or a shady area. On sunny days, if your camera has several flash modes, select Fill-Flash. This will fire the flash even in bright sunlight. This "fills" the shadows on nearby subjects, creating more flattering portraits in direct sunlight. Check your camera's manual.


Use the self-timer
Don't forget to get into some of the pictures yourself. Set your camera on a flat surface or a tripod. Check what you're aiming at in the viewfinder, then set the camera's self-timer so you can join the scene after you press the shutter button. Read your camera manual for detailed instructions on the self-timer.

TILT SHIFT PHOTOSHOP TUTORIAL: HOW TO MAKE FAKE MINIATURE SCENES

I discovered the Tilt Shift technique perusing the photography of Drew Wilson, an uber talented young photographer here in Sarasota. I asked him about the process and he was kind enough to share it with me.

Lil raft

Tilt shift lenses focus on a single part of the photo and shift (blur) the surrounding area to create an optical illusion of miniaturized scenery. Real tilt shift lenses are quite expensive, but a similar effect can be achieved by using Photoshop after you take the photo.
Tilt shift photographs create an optical illusion that makes scenes appear as if they are actually miniature models (like your uncle’s train set). The outer edges are blurred which tricks the eye into perceiving everything in the unblurred parts as miniature. There is a Flickr group dedicated to this technique. It’s a fun post processing trick – and it’s quite easy to reproduce.
Here is my (and Drew’s) Photoshop tutorial for creating fake tilt shift photos.
  1. Taking the photo. An above ground shot is usually best for this type of technique. Cityscapes, crowds, streets, and similar things are perfect.
2. Open the shot in Adobe Photoshop and click onto “quick mask mode


Quick mask mode

3. Select the gradient tool.

4. Select the reflected gradient”.

reflected gradient

5. Draw vertically upwards from where you want the point of focus to be up the screen to the top of the window, and release the mouse button. A red transparent line should appear

Masked tilt shift gradient

6. Go back into “Standard Mask Mode”.

Standard mask mode

7. In Photoshop CS2 or CS3 go to Filter > Blur > Lens Blur (Or if you have Photoshop 7.0 you can use Gaussian Blur). Then select the amount of blur you’d like. You can experiment with the radius value a bit to see what amount of blur looks best.

8. (Optional) For a more “plastic” feel you can increase the saturation and contrast in the photo.
There you have it – you should have a nice “fake tilt shift” photo. You can experiment with lots of different photographs – some are a lot better than others for “miniaturization”. Below are a few more examples. Feel free to link to your own tilt shift photos in the comments. Happy shrinking!

Tiny Gator Fans

My Lil Black G35
Miniature Siesta Key
lil miami at nite


Tuesday 5 April 2011

8 Effect Every Photographer should know about


Photography seems easy at first glance. You simply make your frame and press the shutter button. The reality is, everyone can take a photo but not all can master it. There’s more to photography than just simply “point and shoot.” Photography is a skill only a handful have the patience and the passion to stick with.
Photography students and enthusiasts must educate themselves with many technical terms such as aperture, shutter speed, focus and exposure. You’ve probably read enough about that elsewhere, so how about a few photography effects? In this post I will share some photography tips and effects. They can enhance the beauty of your photos and they can be very fun to do, too.
1. Bokeh
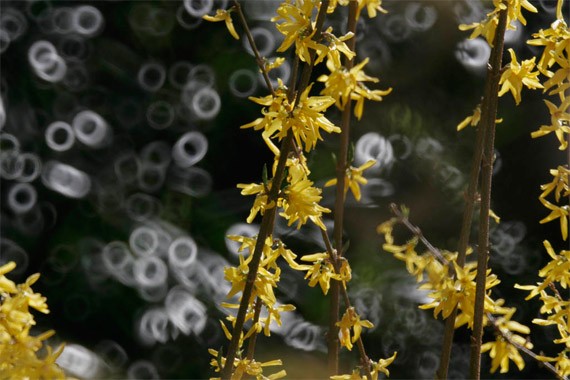
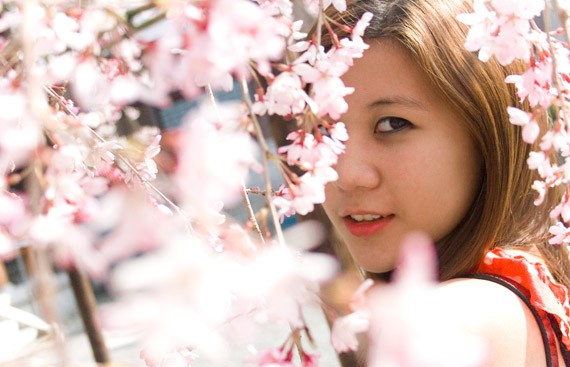
Bokeh refers to the aesthetic quality of blur, the out of focus area of the image. It’s how the light renders lighted areas that are out of focus. The difference in lens aberrations and aperture shape causes the area to blur, creating the look that’s aesthetically pleasing. Many photographers deliberately use the shallow-focus technique to create images with prominent bokeh areas. The term comes from Japanese ‘boke’, which literally means haze or blur.
There’s good bokeh, but there’s also bad bokeh when the blur is so distracting or harsh that it takes the focus away from the subject. Thus, good bokeh can enhance an image while bad bokeh can ruin it.


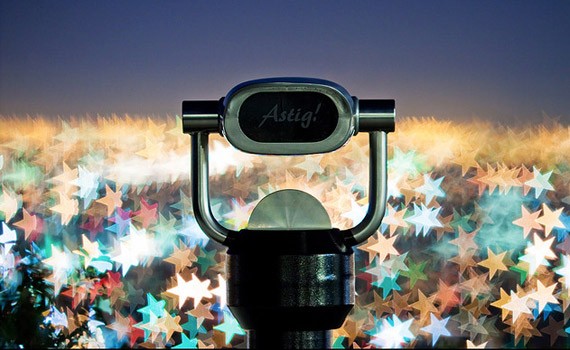
Use of Creative Bokeh
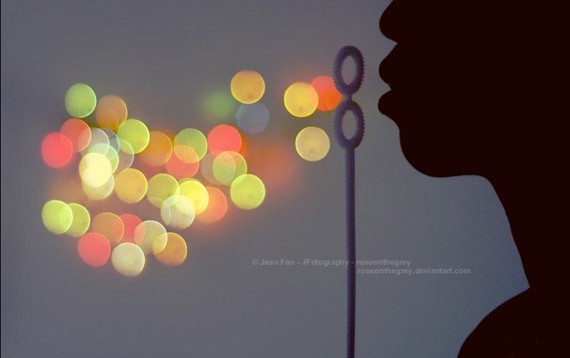
You can also create other shapes of bokeh, such as the heart and star bokeh photos shown below. This can be done by using a filter with the desired shape. You can even create your own. Tutorial can be found here.
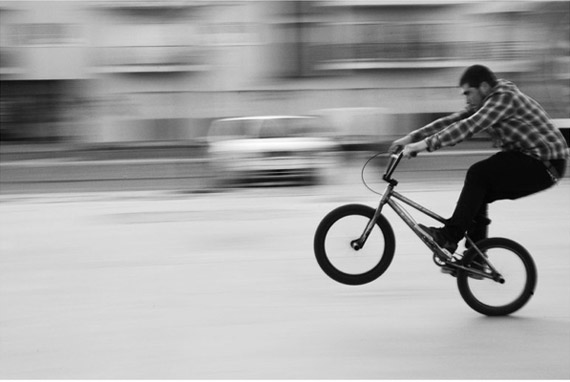
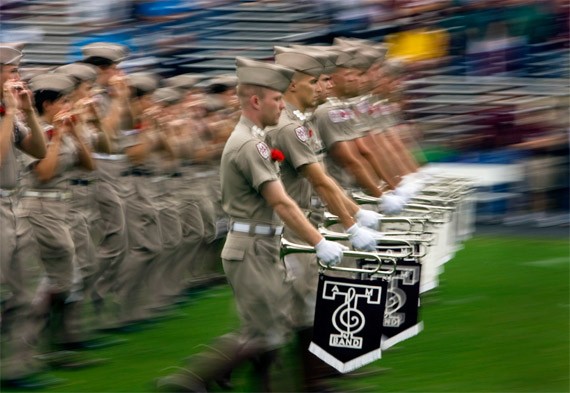

2. Panning

Panning refers to the horizontal, vertical or rotational movement of an image still or video. It’s an age-old technique. To achieve panning, you must have a moving subject that you must ‘stay with’ whilst framing the shot before and after you press the shutter. This will create an interesting effect, with your subject being sharp amid a blurred background. Great for shooting moving subjects or racing and sports events.

Panning will take a lot of practice, but you’ll get used to it and the effort is all worth it. Of course, it is easier to ‘follow’ a human subject than faster subjects like a dog, a motorcycle or a car.
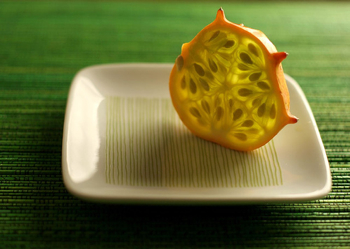
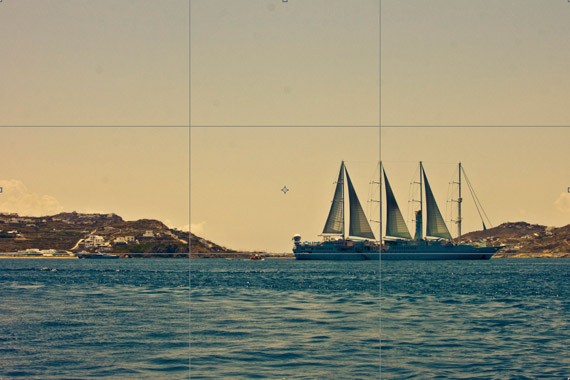


3. Rule of Thirds

The rule of thirds is one of the most basic principles of composition. It has been used for many centuries by artists, painters and now, photographers.


With the Rule of Thirds, the photographer breaks down the photo into thirds, horizontally & vertically so that you have nine equal parts. The main subject is not placed in the middle of the frame, thus it looks dynamic, moving and interesting.
When you are taking a picture you must mentally divide your viewfinder or LCD display into three to frame your shot. With the grid in mind, identify the important points of interest and frame. For some photographers, this comes naturally but for others, it will require practice.


Effective use of the rule of thirds create movement and interest in any photograph


Keep in mind the rule of thirds for post production. If you find an image’s composition boring, you can always post process it by using the cropping and reframing tools of Photoshop. Experiment with the tools at hand to improve your photos.
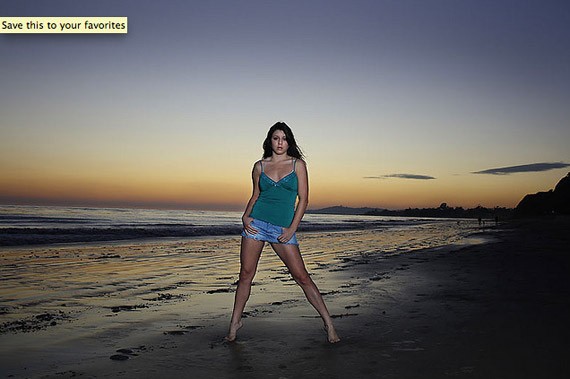
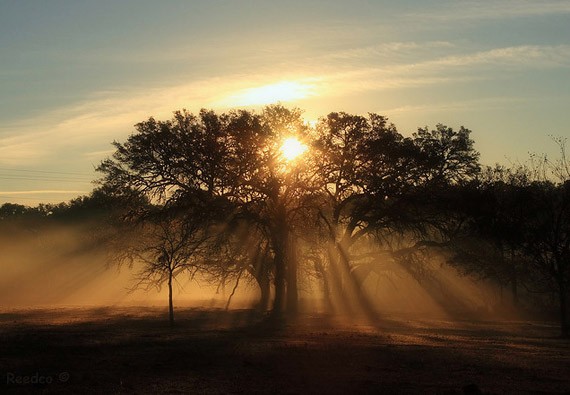
4. The Golden Hour

The Golden Hour, also referred to as the Magic Hour, refers to the first hour the sun rises and the last hour the sun sets. It creates a different quality of light; it adds interest and drama to the scene. It’s the perfect time of the day for creating magnificent photos–but be quick, because lighting quickly changes and fades away.

What really happens during the golden hour? During sunrise and sunset, the sun is near the horizon so the daylight is of the indirect light from the sky, reducing intensity of the sun’s bright light. There is softer lighting, warmer hues and longer shadows. In other times of the day, the sun’s light can be too bright and harsh. The sun’s harsh light is particularly a problem in portrait photography, for the light can create unwanted strong shadows around the face and body.

With landscape photography, photographing landscape during the golden hours enhances the colors of the scene.
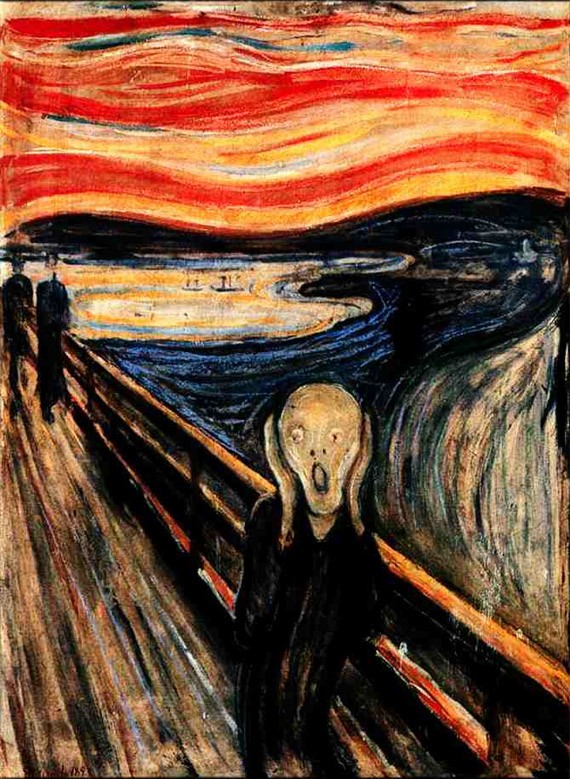
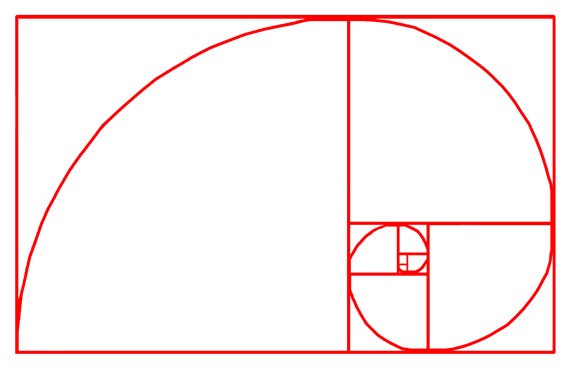


5. Golden Rectangle

The Golden Rectangle, (also the Golden Mean or the Golden Ratio) is another guideline for composition and a variation of the Rule of Thirds, but more intricate. The Golden Rectangle is the mean of the ratio of numbers on the Fibonacci Sequence: 1, 1, 2, 3, 5, 8, 13, 21, 34 and so on). The ratio creates a golden rectangle, which is comprised of a square and half of the square in the same dimension.
Again, the concept goes back to several centuries. The Golden Rectangle is even used to frame Leonardo da Vinci’s Mona Lisa. Paintings, artworks and photos following the Golden Rectangle tend to be stunning and pleasing to the eye. It’s because it’s an aesthetic proportion that can be found naturally: flowers, shells, butterflies and even the human body.


It is very hard to frame the image to the Golden Rectangle means directly from the LCD or viewfinder. Thankfully, there are now several programs that you can use to crop your photos to the Golden Rectangle dimensions during post-production.
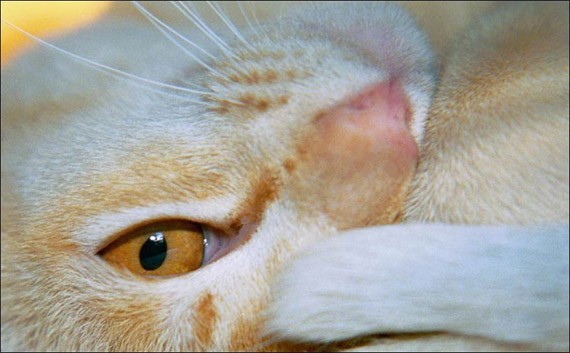
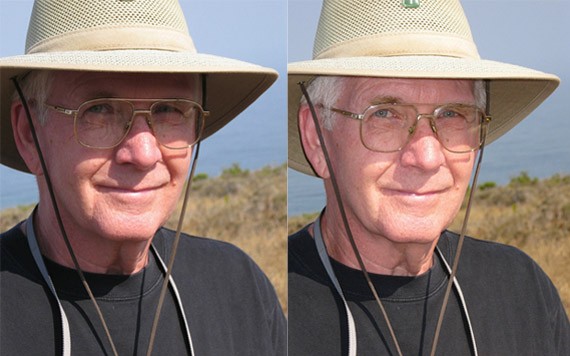


6. Fill Flash

Fill Flash is a technique in photography where the photographer uses flash to ‘fill in’ dark areas of the image. It’s perfect for backlit environments. The background is usually a lot brighter than the subject. To create fill flash, adjust the aperture and shutter speed correctly to expose the background, use flash to lighten the foreground but still retain the qualities of the background.
You can use flash when: the subject is in a shadow, when there is more light on the background than on the foreground, and when you are close enough to the subject for flash. Remember that your built-in flash is only powerful enough to reach up to 9 feet only. Fill Flash can brighten deeply shadowed areas, improving the image without overexposing the other areas of the image.

Fill Flash is great for illuminating the eyes, especially on bright days and the subject is wearing a cap.
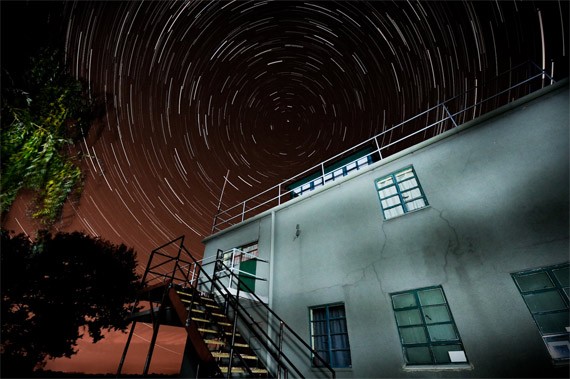
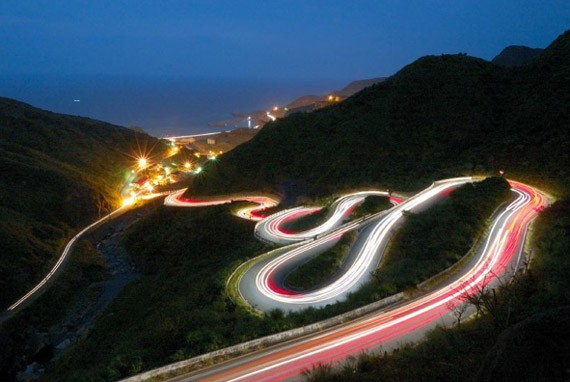
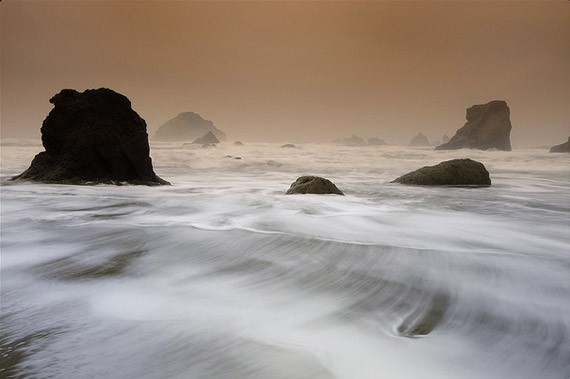


7. Long Exposure

Long exposure is another interesting photography effect which entails a narrow aperture and long duration shutter speed. This is done in order to create dreamy landscapes, capturing the stationary elements while blurring the moving elements of the image.
Long exposure can be tricky. It should be taken in low light situations, most often photos will be overexposed because having long exposure on sunny days can be a problem, as too much light will enter the lens.
It is often referred to as ‘night photography’. Interesting subjects to shoot are stars, moving cars and lights.

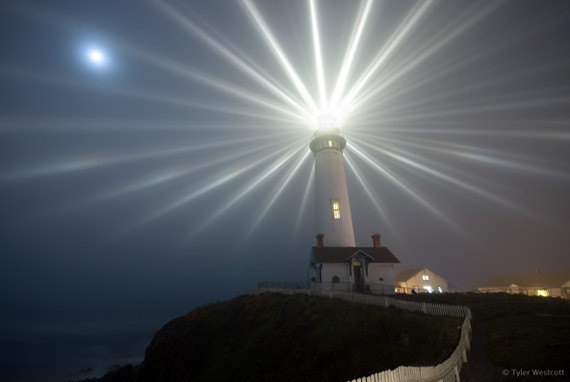
However, there are many beautiful long exposure photographs taken during low light daytime. Shooting fog and water on long exposure is popular in photography.


8. Contre-jour

Contre-jour is a popular photography effect. It is French for ‘against daylight’, the camera is directly pointing towards the light source. Countre-jour is, basically, is the fancy speak of ‘silhouette photography’. The light source is located directly behind the subject.
The contre-jour effect produces high contrast photos between light and dark. It hides details yet emphasizes contour of the subject and shapes. Contre-jour is more popular in nature & landscape photography. The effect is often used to add a more dramatic mood and intense ambiance to the scene

Ironically though, contre-jour can enhance or reduce the quality of detail in the photo. Some recommend using a lens hood to enhance the effect of contre-jour in photographs, significantly reducing the glare coming into the lens. If too much light enters the lens, it will cause overexposure, causing the photo to lose definition.

Conclusion

You don’t need to follow these terms to the dot in order to create a beautiful and interesting image. In fact, rules are made to be broken! Art is about exploring yourself and your medium, after all. But to be an artist of your own you have to learn the basics first before you break them. That’s what Pablo Picasso and Van Gogh did.
Of course, these are not the only effects in photography. There are dozens more, and you can even create a photography effect through your own experimentation. Photography’s only limits is the photographer’s creativity.